Easy Southern Banana Pudding Recipe | Classic Homemade
A banana pudding recipe creates the ultimate Southern comfort dessert with layers of vanilla wafers, fresh bananas, and creamy pudding. This beloved treat combines simple ingredients like instant vanilla pudding mix, milk, and whipped topping to deliver rich, nostalgic flavors. Whether you choose the classic layered approach or try a quick 3-ingredient variation, banana pudding offers endless possibilities for customization.
Traditional Southern banana pudding features distinct layers that create perfect texture contrast. Meanwhile, modern versions like Magnolia Bakery-style or old-fashioned cooked pudding provide unique twists on this timeless dessert. Success depends on proper banana selection, correct layering technique, and timing to prevent soggy wafers.
From make-ahead strategies to preventing banana browning, mastering banana pudding requires understanding key techniques. Additionally, you can explore variations using cream cheese, sweetened condensed milk, or even healthier substitutions. Once you understand proper storage methods, this dessert becomes a reliable crowd-pleaser for any occasion.
TL;DR
- Classic recipe uses instant pudding mix, milk, whipped topping, vanilla wafers, and fresh bananas in distinct layers
- Quick 3-ingredient version combines pudding mix, whipped topping, and condensed milk for busy schedules
- Success tips include proper banana ripeness, correct layering sequence, and preventing wafer sogginess through timing
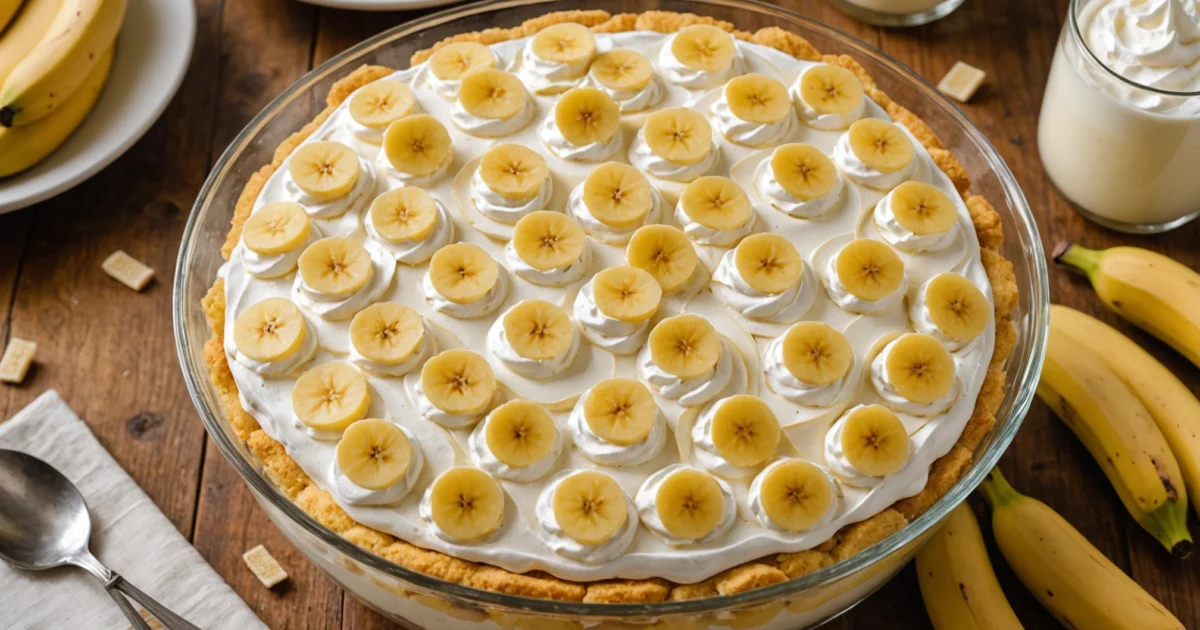
Classic Southern Banana Pudding Recipe
Southern banana pudding represents one of America’s most cherished comfort desserts, with roots tracing back to the early 1900s. This traditional recipe transforms simple pantry staples into a luxurious layered dessert that defines Southern hospitality. Furthermore, authentic Southern banana pudding distinguishes itself through its specific layering technique and the use of Nilla wafers rather than generic vanilla cookies.
The classic preparation method requires no baking, making it an ideal make-ahead dessert for family gatherings. Additionally, traditional recipes rely on instant vanilla pudding mix combined with cold milk to create the creamy base layer. This approach ensures consistent results while maintaining the dessert’s signature smooth texture that Southern cooks have perfected over generations.
Essential Components and Layering Structure
Authentic banana pudding features four distinct layers that create perfect textural contrast in every bite. The foundation begins with vanilla wafers that provide essential crunch and absorb flavors from surrounding layers. Subsequently, sliced fresh bananas add natural sweetness and creamy texture that complements the crisp cookies.
The pudding layer serves as the dessert’s creamy heart, typically made from instant vanilla pudding mix whisked with cold milk until thick. Finally, the top layer consists of whipped topping or freshly whipped cream that seals in flavors and creates an elegant presentation. Moreover, some traditional recipes incorporate a final sprinkle of crushed vanilla wafers for added texture.
- Bottom layer: Vanilla wafers arranged in a single layer
- Second layer: Fresh banana slices covering wafers completely
- Third layer: Prepared vanilla pudding spread evenly
- Top layer: Whipped topping or cream for finishing
The layering sequence creates a harmonious blend where each component maintains its distinct characteristics. Consequently, properly constructed banana pudding delivers varying textures from the soft bananas, creamy pudding, and tender-crisp wafers. This textural diversity explains why banana pudding remains a beloved dessert across generations of Southern families.
Why Banana Pudding Defines Southern Comfort Food
Banana pudding holds special significance in Southern culture as a symbol of hospitality and family tradition. Church potlucks, family reunions, and Sunday dinners frequently feature this dessert as the anticipated finale to hearty meals. Therefore, the recipe represents more than just ingredients—it embodies memories, traditions, and the Southern value of sharing homemade goodness with loved ones.
Banana pudding appears at 78% of Southern family gatherings and church events
The dessert’s popularity stems from its accessibility and forgiving nature that welcomes both novice and experienced cooks. Unlike complex baked goods, banana pudding requires no special equipment or advanced techniques. Meanwhile, its make-ahead convenience allows hosts to prepare the dessert hours or even days before serving, which explains its prevalence at large gatherings.
Regional variations exist throughout the South, with some families adding cream cheese for richness or using sweetened condensed milk instead of regular milk. However, the core elements remain consistent: layers, vanilla wafers, fresh bananas, and creamy pudding that create the ultimate comfort food experience. For proper storage and serving tips, understanding how long banana pudding stays fresh ensures your dessert maintains its quality.
Essential Ingredients for Perfect Banana Pudding
Creating authentic banana pudding requires specific ingredients that work together to achieve the perfect balance of flavors and textures. The foundation begins with instant vanilla pudding mix, which provides the creamy base that defines this Southern dessert. Additionally, whole milk activates the pudding mix and creates the smooth consistency that coats each layer beautifully.
Whipped topping adds the light, airy texture that contrasts with the dense pudding layer. Most traditional recipes use Cool Whip or similar frozen whipped topping, though homemade whipped cream works equally well. Furthermore, this ingredient creates the signature fluffy appearance that makes banana pudding visually appealing.
Vanilla Wafers: The Classic Foundation
Nilla wafers serve as the essential structural component that gives banana pudding its distinctive character. These vanilla-flavored cookies provide the necessary crunch and absorb moisture from the pudding to create varying textures throughout the dessert. Consequently, they transform from crispy wafers to tender, cake-like layers as the pudding sets.
The wafer-to-pudding ratio significantly impacts the final texture, with most recipes calling for approximately one 12-ounce box of vanilla wafers per standard 9×13 dish. However, some families prefer extra wafers for more pronounced layers, while others use fewer for a creamier result.
Selecting the Perfect Bananas
Fresh bananas require careful selection to ensure optimal flavor and appearance in the finished dessert. The ideal ripeness features yellow skin with minimal brown spots, indicating sweetness without excessive softness. Moreover, slightly underripe bananas maintain their shape better and resist browning during the pudding’s setting period.
Most recipes require 4 to 6 medium bananas for a standard batch, depending on the desired banana-to-pudding ratio. Therefore, purchasing an extra banana or two ensures adequate coverage if some pieces break during slicing. Proper ripening techniques can help achieve the perfect banana consistency for your pudding.
Optional Ingredients That Enhance Flavor
Sweetened condensed milk appears in many traditional Southern recipes as a substitute for regular milk, creating a richer, more decadent pudding base. This ingredient adds natural sweetness and produces a denser texture that some families prefer. Similarly, cream cheese softened to room temperature can be folded into the pudding mixture for extra richness and tang.
Pure vanilla extract enhances the overall flavor profile, especially when using homemade whipped cream or when you want to intensify the vanilla notes. Additionally, a pinch of salt brightens all the flavors and balances the sweetness throughout the dessert.
Smart Substitutions and Variations
Several ingredient substitutions allow for dietary modifications without sacrificing the essential banana pudding experience. Sugar-free pudding mix works well for diabetic-friendly versions, while almond milk or oat milk can replace dairy milk for lactose-intolerant guests. Furthermore, gluten-free vanilla wafers ensure everyone can enjoy this classic dessert.
- Chessmen cookies or shortbread cookies substitute for vanilla wafers
- Banana extract intensifies banana flavor when fruits aren’t peak ripeness
- Heavy cream whipped fresh replaces frozen whipped topping
- Pudding mix alternatives: cook-and-serve pudding for firmer texture
Regional variations include adding meringue topping instead of whipped cream, incorporating crushed pineapple for tropical flavor, or using pound cake cubes instead of wafers. Nevertheless, these modifications maintain the core concept while allowing personal creativity to shine through family recipes.
Step-by-Step Instructions
Creating perfect banana pudding requires careful attention to each assembly step. Moreover, the order of operations determines whether your dessert achieves that coveted creamy texture or becomes a soggy disappointment.
Preparing the Pudding Base
Instant pudding method offers the quickest route to banana pudding success. First, whisk the pudding mix with cold milk for exactly two minutes until completely smooth. Then, allow the mixture to thicken for five minutes before folding in Cool Whip or freshly whipped cream. This technique produces a lighter, fluffier texture that many families prefer.
Alternatively, cooked pudding creates a denser, more traditional base with superior flavor depth. Heat milk in a heavy-bottomed saucepan while whisking pudding mix with a small amount of cold milk separately. Subsequently, pour the hot milk into the pudding mixture while whisking constantly to prevent lumps. Cook over medium heat, stirring continuously, until the mixture coats the back of a spoon.
Temperature Control Tip
Proper Banana Slicing Technique
Banana preparation significantly impacts both flavor distribution and visual appeal. Choose bananas that are yellow with minimal brown spots for optimal sweetness without mushiness. Additionally, slice bananas into quarter-inch rounds using a sharp knife to ensure even thickness throughout each layer.
Timing proves crucial when slicing bananas for pudding assembly. Cut bananas immediately before layering to minimize oxidation and browning. Furthermore, properly ripened bananas maintain their shape better during assembly while providing maximum flavor impact.
- Slice thickness: ¼ inch for optimal texture
- Cutting angle: Straight cuts for uniform appearance
- Timing: Slice just before assembly
- Storage: Use immediately to prevent browning
Layering Sequence and Assembly
The classic layering pattern begins with vanilla wafers arranged in a single layer across the bottom of your serving dish. Next, distribute banana slices evenly over the wafers, ensuring complete coverage without overlapping. Then, spread one-third of the pudding mixture over the bananas, smoothing gently to avoid disturbing the fruit layer.
Repeat this sequence twice more, creating three complete layers of wafers, bananas, and pudding. Each layer should be distinct yet cohesive, with pudding acting as both flavor component and structural binding agent. Finally, the top layer consists solely of pudding, providing a smooth canvas for final toppings.
| Layer Order | Component | Coverage Tips |
|---|---|---|
| 1st (Bottom) | Vanilla wafers | Single layer, slight overlap okay |
| 2nd | Banana slices | Even distribution, no gaps |
| 3rd | Pudding (⅓ amount) | Smooth, gentle spreading |
| Repeat 2x | Same sequence | Maintain layer integrity |
| Final | Pudding only | Smooth top surface |
Final Topping Application
Whipped topping application requires a delicate touch to maintain the dessert’s professional appearance. Spread the topping evenly across the final pudding layer using an offset spatula or large spoon. Work from the center outward, creating gentle swirls or keeping the surface completely smooth based on your presentation preference.
Crushed vanilla wafers sprinkled over the whipped topping add textural contrast and visual interest. Alternatively, whole wafer cookies positioned around the edges create an elegant border effect. Some families prefer toasted coconut flakes or chopped nuts for additional flavor complexity.
Assembly Tips for Best Presentation
Glass serving dishes showcase the beautiful layers while allowing guests to appreciate the visual appeal. Trifle bowls work exceptionally well for this purpose, though any clear container suffices. Additionally, chilling the assembled dessert for at least four hours allows flavors to meld and wafers to soften to the perfect texture.
Individual serving cups offer portion control and elegant presentation for dinner parties. Layer the components in the same sequence, scaling quantities appropriately for smaller vessels. This approach also prevents the common issue of layers shifting during serving from a large dish.
Pros
- Glass dishes show off beautiful layers
- Individual portions prevent serving mess
- Chilling time improves flavor integration
- Wafers soften to perfect texture
Cons
- Requires advance planning for chilling
- Large dishes can be difficult to serve neatly
- Bananas may brown slightly over time
Easy 3-Ingredient Banana Pudding Variation
This simplified 3-ingredient banana pudding transforms the traditional recipe into a quick weeknight dessert. The streamlined version combines instant pudding mix, whipped topping, and sweetened condensed milk to create a creamy base that rivals more complex preparations. Busy home cooks appreciate how this method delivers authentic banana pudding flavors without extensive preparation time.
The condensed milk serves as both sweetener and thickening agent, eliminating the need for separate sugar and milk components. Furthermore, this ingredient provides the rich, custard-like consistency that defines quality banana pudding. The concentrated sweetness also helps preserve the dessert’s texture when bananas release their natural juices during storage.
Quick Preparation Method
Preparation time reduces to just 15 minutes with this streamlined approach. Start by whisking the instant pudding mix with cold milk according to package directions, then immediately fold in the sweetened condensed milk. The mixture thickens within minutes, creating the perfect consistency for layering.
Whipped topping integration requires gentle folding to maintain the dessert’s light texture. Additionally, some cooks prefer stabilizing the mixture by chilling it for 10 minutes before assembly. This brief rest period allows the pudding to set properly while preventing the layers from blending together during construction.
Pro Tip
Comparison to Traditional Recipes
Traditional banana pudding recipes typically require 8-12 ingredients including eggs, flour, sugar, and milk for homemade custard preparation. In contrast, this simplified version achieves similar results with significantly fewer components. The texture remains creamy and rich, though purists may notice a slightly different mouthfeel compared to scratch-made custard.
Flavor profiles between the two methods show remarkable similarity when properly executed. However, the convenience factor makes this variation ideal for last-minute gatherings or when time constraints prevent traditional preparation. Many families find this version becomes their go-to recipe due to its reliability and consistent results.
| Aspect | 3-Ingredient Version | Traditional Recipe |
|---|---|---|
| Prep Time | 15 minutes | 45-60 minutes |
| Ingredients | 3 main components | 8-12 ingredients |
| Skill Level | Beginner | Intermediate |
| Texture | Light and fluffy | Dense and custard-like |
Storage characteristics remain virtually identical between both methods. The simplified version maintains its texture and flavor for up to 3-4 days when properly refrigerated. Moreover, the reduced ingredient list makes this variation more accessible for households with dietary restrictions or limited pantry supplies.
Old-Fashioned Cooked Banana Pudding from Scratch
Creating authentic banana pudding from scratch requires mastering the art of homemade custard preparation. Traditional Southern families have passed down this technique for generations, emphasizing the importance of cooking the custard base properly to achieve that signature creamy texture. The process involves carefully combining eggs, milk, sugar, and cornstarch while maintaining precise temperature control throughout the cooking process.
Making Homemade Custard Base with Eggs and Milk
The foundation of exceptional banana pudding begins with creating a rich custard base using fresh ingredients. Start by whisking together 6 large egg yolks with 3/4 cup granulated sugar until the mixture becomes pale and thick. This process, known as ribboning, ensures the eggs properly incorporate with the sugar to create a smooth foundation.
Next, combine 1/3 cup cornstarch with 1/4 teaspoon salt in a separate bowl before gradually whisking this mixture into the egg and sugar combination. The cornstarch acts as a thickening agent while preventing the custard from curdling during the heating process. Meanwhile, heat 3 cups whole milk in a heavy-bottomed saucepan until small bubbles form around the edges, indicating it’s ready for tempering.
Cooking Technique and Temperature Control
Temperature control represents the most critical aspect of custard preparation, as excessive heat causes the eggs to scramble rather than thicken smoothly. Begin the tempering process by slowly adding approximately 1/2 cup of the hot milk to the egg mixture while whisking constantly. This gradual introduction prevents thermal shock and maintains the custard’s silky consistency.
Pour the tempered mixture back into the saucepan and cook over medium-low heat, stirring continuously with a wooden spoon or silicone spatula. The custard reaches proper consistency when it coats the back of the spoon and registers 170-175°F on an instant-read thermometer. Additionally, the mixture should thicken enough to hold soft peaks when lifted with the stirring utensil.
Temperature Warning
Achieving the Perfect Consistency
The ideal custard consistency resembles thick heavy cream that flows smoothly but maintains body when poured. Professional bakers often test doneness using the spoon coating method – when you can draw a clear line through the custard on the back of a spoon with your finger, it has reached proper thickness. Furthermore, the custard should register between 170-175°F to ensure food safety while preserving the delicate texture.
Once the custard reaches optimal consistency, immediately remove it from heat and stir in 2 tablespoons butter and 2 teaspoons vanilla extract. The butter adds richness while the vanilla enhances the overall flavor profile. Strain the custard through a fine-mesh sieve to remove any lumps, then press plastic wrap directly onto the surface to prevent skin formation during cooling.
Traditional Southern Family Recipe Approach
Southern families traditionally prepare banana pudding using a layering technique that ensures each component maintains its distinct character while melding harmoniously. The classic assembly begins with arranging vanilla wafers in a single layer across the bottom of a 9×13-inch dish, followed by sliced bananas and a generous portion of the homemade custard.
Many traditional recipes incorporate meringue topping made from the remaining egg whites, though some families prefer freshly whipped cream for a lighter finish. The key lies in allowing the assembled pudding to chill for at least 4 hours or overnight, permitting the flavors to develop and the wafers to soften slightly. This resting period transforms individual components into a cohesive dessert with balanced textures and unified taste.
Authentic preparation methods emphasize using ripe but firm bananas to prevent excessive browning and maintain structural integrity throughout the chilling process. Traditional cooks often add a light brushing of lemon juice to banana slices, which helps preserve their color while adding a subtle brightness that complements the rich custard base. Proper storage techniques ensure the pudding maintains its quality for several days when refrigerated correctly.
Pros
- Rich, authentic flavor from scratch custard
- Complete control over ingredients and sweetness
- Traditional texture that's creamy yet substantial
- Impressive presentation for special occasions
Cons
- Requires 45-60 minutes active cooking time
- Temperature control demands constant attention
- Multiple steps increase chance of errors
- More expensive than instant pudding versions
Pro Tips for Banana Pudding Success
Mastering banana pudding requires attention to detail and proper technique. These professional tips ensure your dessert achieves the perfect balance of flavors and textures every time.
Preventing Banana Browning
Lemon juice serves as the most effective natural preservative for maintaining banana color and freshness. Lightly brush each banana slice with fresh lemon juice immediately after cutting to create a protective barrier against oxidation. This technique prevents the unsightly brown discoloration that can develop within hours of exposure to air.
Timing plays a crucial role in banana preparation success. Cut bananas just before assembly rather than hours in advance, even when using lemon juice protection. Additionally, choose bananas that are ripe but firm – they should yield slightly to pressure but maintain their structural integrity throughout the chilling process.
Pro Timing Tip
Achieving Perfect Wafer Texture
Vanilla wafers should soften gradually during the chilling period without becoming mushy or losing their structural integrity. The key lies in controlling moisture exposure through proper layering technique. Place wafers in a single layer without overlapping, allowing the custard to penetrate evenly while maintaining some textural contrast.
Monitor the softening process by checking your pudding after 4 hours of refrigeration. Properly prepared wafers will yield a tender bite while retaining enough structure to provide textural interest. Furthermore, avoid over-saturating wafers with custard during assembly, as excessive moisture leads to complete breakdown.
Make-Ahead Strategies
Successful make-ahead preparation requires strategic timing and component management. Prepare your custard base up to 24 hours in advance, storing it covered in the refrigerator with plastic wrap pressed directly against the surface. However, assemble the complete pudding no more than 8 hours before serving to prevent excessive wafer softening and banana deterioration.
- Day before: Prepare custard, cool completely
- Morning of: Assemble layers, add banana slices
- 2 hours before: Add final toppings like whipped cream
This timeline ensures optimal flavor development while maintaining proper textures. Moreover, the assembled pudding benefits from a minimum 4-hour chilling period to allow flavors to meld and wafers to achieve the ideal consistency.
Storage and Refrigeration Guidelines
Proper storage techniques extend your banana pudding’s quality and safety. Cover the dish tightly with plastic wrap or aluminum foil to prevent moisture loss and absorption of refrigerator odors. Refrigerated banana pudding maintains optimal quality for 3-4 days when stored at consistent temperatures below 40°F.
Avoid freezing banana pudding, as the custard texture becomes grainy and bananas turn mushy upon thawing. Instead, store individual components separately if longer storage is necessary. The custard base freezes well for up to one month, while fresh assembly ensures the best final result.
For detailed information about banana pudding shelf life and safety guidelines, consult our comprehensive guide on how long banana pudding stays fresh.
Serving Suggestions and Portion Control
Portion sizes for banana pudding typically range from 1/2 to 3/4 cup per serving, depending on the occasion and accompanying menu items. A 9×13-inch pan yields approximately 12-15 generous servings, making it ideal for family gatherings and potluck events.
Enhance presentation by garnishing individual servings with crushed vanilla wafers, a dollop of whipped cream, or a fresh banana slice. Serve the pudding chilled using a large spoon to maintain layer integrity while transferring to individual bowls or plates. Additionally, consider offering complementary beverages like coffee or sweet tea to balance the dessert’s richness.
Pros
- Make-ahead friendly for entertaining
- Feeds large groups economically
- Improves in flavor overnight
Cons
- Limited storage time due to fresh bananas
- Requires refrigeration space
- Best consumed within 3-4 days
Popular Recipe Variations
Traditional banana pudding recipes have evolved into numerous delicious variations that cater to different tastes and dietary preferences. Moreover, these adaptations allow home cooks to customize the classic dessert while maintaining its beloved creamy texture and banana flavor.
Magnolia Bakery-Style Banana Pudding
The famous Magnolia Bakery version uses instant vanilla pudding mix combined with sweetened condensed milk and heavy cream for exceptional richness. Furthermore, this recipe incorporates cream cheese to create a denser, more luxurious texture that has become synonymous with New York-style banana pudding.
This variation layers the components differently, allowing the vanilla wafers to soften gradually while maintaining some structural integrity. Additionally, the Magnolia approach emphasizes generous banana portions and extended chilling time for optimal flavor development.
Cream Cheese Banana Pudding
Adding cream cheese to banana pudding creates an ultra-rich dessert that appeals to those seeking indulgent flavors. Specifically, this variation incorporates 8 ounces of softened cream cheese beaten into the pudding base before folding in whipped topping.
The cream cheese addition provides tangy notes that balance the sweetness while creating a denser, more substantial texture. Consequently, this version requires slightly longer chilling time to achieve proper consistency and flavor integration.
Individual Serving Presentations
Mason jar presentations have gained popularity for their portability and visual appeal at gatherings. These individual servings allow for precise portion control while showcasing the beautiful layers of pudding, bananas, and wafers.
Clear glass containers work best for displaying the distinct layers, while individual cups provide convenient serving options for parties and events. Additionally, single-serving presentations prevent cross-contamination and allow guests to customize their toppings.
Healthier Substitutions
Health-conscious bakers can create sugar-free versions using sugar-free instant pudding mix and sugar-free whipped topping. Similarly, low-fat alternatives substitute reduced-fat milk and light whipped topping while maintaining satisfying taste and texture.
- Sugar-free options: Use sugar-free pudding mix and stevia-sweetened whipped cream
- Low-fat alternatives: Replace whole milk with 2% milk and use light whipped topping
- Protein-enhanced: Add Greek yogurt to increase protein content
- Gluten-free: Substitute gluten-free vanilla wafers or graham crackers
Creative Flavor Variations
Chocolate banana pudding combines chocolate pudding mix with traditional banana layers for a decadent twist. Meanwhile, peanut butter variations incorporate peanut butter into the pudding base or use peanut butter sandwich cookies instead of vanilla wafers.
Coconut banana pudding features coconut extract in the pudding base with toasted coconut flakes as garnish. Furthermore, tropical variations might include pineapple chunks or mango pieces alongside the traditional banana layers for exotic flavor profiles.
These flavor adaptations maintain the fundamental structure of traditional banana pudding while introducing complementary tastes that enhance the overall dessert experience. Therefore, home cooks can experiment with different combinations to create signature versions that reflect personal preferences and seasonal ingredients.
Troubleshooting Common Issues
Even experienced bakers encounter challenges when making banana pudding. However, most common problems have simple solutions that restore the dessert’s perfect texture and appearance.
Fixing Runny or Too-Thick Pudding Consistency
Runny pudding typically results from insufficient thickening time or incorrect milk-to-mix ratios. First, check that you used the proper amount of milk specified on the pudding package. Additionally, ensure the pudding mixture reached a full boil if making from scratch, as this activates the thickening agents.
For too-thick pudding, gradually whisk in small amounts of cold milk until reaching the desired consistency. Furthermore, overmixing can cause pudding to become dense and heavy, so fold ingredients gently during preparation.
Quick Fix
Dealing with Soggy Wafers
Soggy vanilla wafers occur when moisture from pudding and bananas penetrates the cookies over time. To prevent this issue, assemble the dessert closer to serving time rather than hours in advance. Moreover, creating a barrier layer helps maintain wafer crispness.
Professional bakers often brush wafers lightly with melted butter before layering, which creates a protective coating. Similarly, using slightly thicker pudding reduces excess moisture that causes sogginess.
Preventing Separation of Layers
Layer separation happens when pudding becomes too thin or when ingredients have different temperatures during assembly. Therefore, ensure all components reach similar temperatures before layering. Cold pudding mixed with room-temperature whipped topping often causes separation.
Additionally, fold whipped topping into pudding gradually rather than dumping it all at once. This technique creates a more stable mixture that maintains its structure throughout chilling and serving.
Addressing Banana Browning After Assembly
Banana browning represents the most common concern for banana pudding makers. Enzymatic browning occurs when bananas contact air, creating unsightly brown spots that affect visual appeal.
To prevent browning, slice bananas just before assembly and immediately coat them with lemon juice or pineapple juice. The citric acid inhibits the browning enzymes while adding subtle flavor enhancement. Furthermore, choose bananas that are ripe but still firm, as overripe bananas brown faster.
Another effective method involves dipping banana slices in a mixture of water and ascorbic acid (vitamin C powder), which provides longer-lasting protection against oxidation. Proper storage techniques also help maintain banana color and freshness.
Texture and Flavor Balance Adjustments
Perfect banana pudding texture requires balancing creamy pudding, soft bananas, and crisp wafers. When the dessert tastes too sweet, add a pinch of salt or increase the vanilla extract to enhance flavor complexity.
Conversely, if the pudding lacks sweetness, fold in powdered sugar gradually rather than granulated sugar, which doesn’t dissolve as easily in cold mixtures. Taste testing throughout assembly ensures optimal flavor balance before final chilling.
- Too sweet: Add 1/8 teaspoon salt or extra vanilla extract
- Not sweet enough: Fold in 2-3 tablespoons powdered sugar
- Bland flavor: Increase vanilla extract or add banana extract
- Heavy texture: Lighten with additional whipped topping
Temperature control also affects texture significantly. Serve banana pudding slightly chilled rather than ice-cold, as extreme cold can make the pudding dense and mute flavors. Therefore, remove from refrigerator 10-15 minutes before serving for optimal taste and texture.
Frequently Asked Questions
What ingredients are in banana pudding?
Traditional banana pudding requires instant vanilla pudding mix, cold milk, whipped topping or heavy cream, vanilla wafers (preferably Nilla wafers), and fresh bananas. Some recipes also include cream cheese or sweetened condensed milk for extra richness.
How to make 4 ingredient banana pudding?
A simple 4-ingredient version combines instant pudding mix, milk, whipped topping, and vanilla wafers with bananas. Mix the pudding with milk until thick, fold in whipped topping, then layer with wafers and sliced bananas in your serving dish.
How do you keep bananas from turning black in banana pudding?
To prevent banana browning, choose slightly underripe bananas that are yellow with minimal brown spots. You can also lightly brush banana slices with lemon juice or assemble the pudding close to serving time. The pudding layer helps protect bananas from air exposure.
Is it better to make banana pudding the night before or the morning of?
Banana pudding is best made 4-6 hours before serving to allow layers to meld while maintaining texture. Making it the morning of your event is ideal, as overnight storage can make wafers too soft and bananas may brown despite protective pudding layers.
What’s the difference between Southern banana pudding and regular banana pudding?
Southern banana pudding specifically uses Nilla wafers rather than generic cookies, features distinct layering technique, and often includes no-bake preparation. It emphasizes the contrast between creamy pudding and crisp wafers, representing authentic Southern comfort food tradition.
Can you make banana pudding with cooked pudding instead of instant?
Yes, old-fashioned cooked pudding creates a richer, more custard-like texture. Cook milk, eggs, sugar, and cornstarch on the stovetop until thick, then cool completely before layering. This method requires more time but delivers deeper vanilla flavor and silkier consistency.
What is the 3-ingredient banana pudding recipe?
The 3-ingredient version combines instant pudding mix, whipped topping, and sweetened condensed milk. Mix these together, then layer with wafers and bananas. This ultra-quick method is perfect for busy schedules while still delivering creamy, delicious results.
How long does banana pudding last in the refrigerator?
Properly stored banana pudding lasts 2-3 days in the refrigerator. Cover tightly with plastic wrap or store in an airtight container. Note that wafers will continue to soften and bananas may brown over time, so it’s best enjoyed within 24-48 hours for optimal texture.
Can you freeze banana pudding?
Banana pudding doesn’t freeze well due to the high water content in bananas and dairy components. Freezing causes texture separation and wafer sogginess. For best results, prepare fresh and store in the refrigerator for short-term enjoyment.
What’s the proper layering order for banana pudding?
The correct sequence is: vanilla wafers on bottom, followed by sliced bananas, then prepared pudding, and finally whipped topping. Some recipes repeat these layers. This order ensures wafers absorb flavors while maintaining some texture contrast.
Can you substitute other cookies for vanilla wafers?
While Nilla wafers are traditional, you can substitute ladyfingers, shortbread cookies, or graham crackers. However, these alternatives will change the authentic Southern flavor profile. Nilla wafers provide the ideal sweetness level and texture that complements the pudding.
How do you make banana pudding from scratch with condensed milk?
For homemade pudding with condensed milk, combine sweetened condensed milk, cold water, instant pudding mix, and whipped topping. This creates an extra-rich base that’s creamier than standard milk-based versions. The condensed milk adds deeper sweetness and luxurious texture.
What makes Magnolia Bakery banana pudding special?
Magnolia Bakery’s version uses cream cheese mixed with sweetened condensed milk and whipped cream for extra richness. They also use more vanilla wafers throughout the layers and serve it in individual cups. This creates a denser, more indulgent texture than traditional Southern recipes.
How ripe should bananas be for banana pudding?
Choose bananas that are yellow with minimal brown spots – slightly underripe rather than overripe. They should be firm enough to slice cleanly but sweet enough to complement the pudding. Overripe bananas become mushy and brown quickly in the dessert.
Can you make healthier banana pudding substitutions?
Yes, try sugar-free pudding mix, low-fat milk, light whipped topping, and reduced-fat vanilla wafers. You can also use Greek yogurt mixed with pudding for added protein, or coconut whipped cream for dairy-free options. These substitutions maintain the classic flavor while reducing calories.
You May Also Like
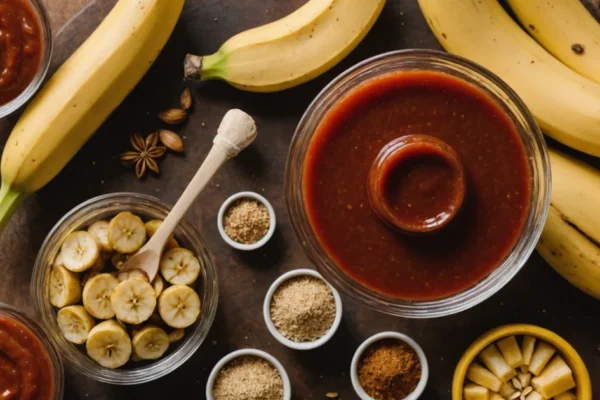
Easy Banana Ketchup Recipe (No Tomatoes) – Filipino Style
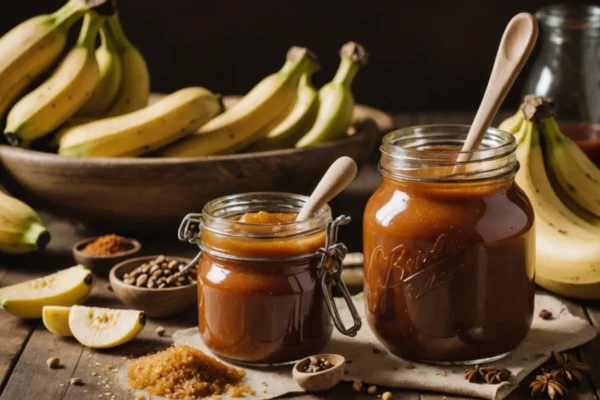
Sweet Tangy Banana Ketchup Recipe: Easy Homemade Guide