How to Ripen a Banana in the Oven (15 Minutes or Less)
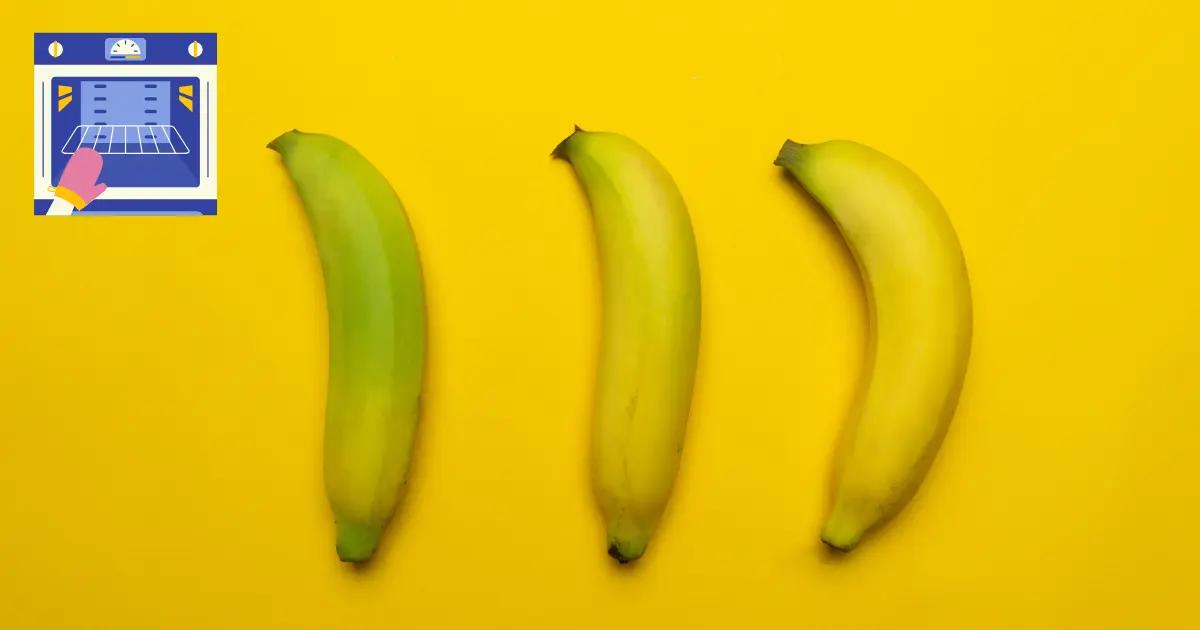
If you’ve ever started a banana pudding or banana bread recipe only to realize your bananas are still green and rock-hard, you know the frustration. The good news? You can ripen banana in oven in just 15-40 minutes, transforming those stubborn green bananas into soft, sweet fruit perfect for baking. This fast banana ripening method uses gentle heat to accelerate the natural ripening process, giving you baking-ready bananas when you need them immediately. While oven-ripened bananas won’t taste identical to naturally ripened ones, they work beautifully in recipes and can save your baking plans when time isn’t on your side.
Why Ripen Bananas in the Oven? (When You Need Them Fast)
The primary reason to ripen bananas in the oven is simple: speed. Natural banana ripening takes 3-7 days depending on how green they are when purchased. When you’re ready to bake right now, waiting nearly a week isn’t practical. The oven method delivers results in under an hour, making it the go-to solution for last-minute baking emergencies.
This technique is particularly valuable when you need bananas for specific recipes. Banana bread, muffins, pancakes, and smoothies all benefit from riper, sweeter bananas. Green bananas contain more resistant starch and less sugar, which means they won’t provide the moisture, sweetness, or binding properties that baked goods require. When you ripen green bananas fast using heat, you’re converting those starches into sugars and softening the fruit’s structure.
Beyond baking emergencies, some people prefer this method because it’s controllable and predictable. Unlike leaving bananas on the counter and hoping they ripen at the right pace, the oven gives you direct control over timing. You can ripen exactly the number of bananas you need, exactly when you need them, without worrying about the rest of your bunch over-ripening.
The oven method also works regardless of season or climate. Natural ripening slows down in cold weather, but your oven maintains consistent temperature year-round. If you live in a cooler climate or it’s winter, how to ripen bananas quickly becomes especially relevant, and the oven provides a reliable solution.
How to Ripen a Banana in the Oven: Step-by-Step Instructions
The process to ripen bananas for baking in your oven is straightforward, but following the exact steps ensures the best results. Here’s the complete method from start to finish:
Step 1: Preheat Your Oven
Set your oven to 300°F (150°C). This moderate temperature is crucial—too hot and you’ll cook the bananas instead of ripening them; too cool and the process takes unnecessarily long. Allow the oven to fully preheat for even heat distribution.
Step 2: Prepare Your Bananas
Leave the bananas in their peels. The peel protects the fruit from direct heat and helps the ripening process occur more evenly. Place unpeeled bananas directly on a baking sheet lined with parchment paper or aluminum foil. The lining catches any banana juices that may leak during the process, making cleanup easier.
Step 3: Bake Until Softened
Place the baking sheet in the preheated oven. For moderately green bananas, bake for 15-20 minutes. For very green bananas, extend the time to 30-40 minutes. The bananas are ready when the peels turn completely black and the fruit feels soft when gently pressed (use an oven mitt—they’ll be hot).
Step 4: Cool Before Using
Remove the baking sheet from the oven and let the bananas cool for 5-10 minutes. The peels will be extremely hot and the fruit inside will be steaming. Once cool enough to handle, peel the bananas. The flesh should be soft, slightly darker than fresh bananas, and easy to mash.
Step 5: Use Immediately or Refrigerate
Oven-ripened bananas are best used right away while still warm, or you can refrigerate them for up to 24 hours. The texture may become slightly watery if stored longer, but they’ll still work fine in most baking recipes.
Oven Temperature and Time for Ripening Bananas
Getting the temperature and timing right is essential when you want to ripen bananas in oven or microwave (though we’ll focus on oven here). The standard recommendation is 300°F (150°C), but understanding the variables helps you adjust for your specific situation.
Temperature Guidelines:
- 300°F (150°C): The ideal temperature for most situations. Provides gentle, even ripening without cooking the fruit.
- 250°F (120°C): Use this lower temperature if you want slower, more controlled ripening or if your bananas are only slightly green. Time increases to 30-50 minutes.
- 350°F (175°C): Faster but riskier. The bananas may cook rather than ripen, resulting in a more “baked” flavor. Only use if you’re in an extreme hurry and plan to use them in baked goods where the cooked flavor won’t be noticeable.
Timing Based on Banana Ripeness:
- Bright green, very firm: 35-40 minutes at 300°F
- Green-yellow, mostly firm: 20-30 minutes at 300°F
- Yellow with green tips, slightly firm: 15-20 minutes at 300°F
- Yellow with no brown spots, just needs softening: 10-15 minutes at 300°F
Visual cues are more reliable than strict timing. Your bananas are ready when the peels turn completely black and the fruit yields easily to gentle pressure. Don’t worry about the dramatic color change—this is normal and doesn’t mean the banana inside is burnt or ruined.
For those wondering how long to ripen banana in oven precisely, the answer depends on your starting point. A good rule of thumb: check at 15 minutes for yellow bananas, 25 minutes for green-yellow bananas, and 35 minutes for very green bananas. You can always add more time, but you can’t undo over-ripening.
What Happens to Bananas When You Ripen Them in the Oven
Understanding the science behind oven ripening helps explain both why it works and what changes occur. When you ripen green bananas quickly using heat, you’re essentially accelerating chemical processes that would normally take days.
Starch Conversion: Green bananas contain high levels of resistant starch, which is why they taste starchy and slightly bitter. Heat triggers enzymes that convert these starches into simple sugars (primarily glucose, fructose, and sucrose). This is why oven-ripened bananas taste sweeter than their green counterparts, though not quite as sweet as naturally ripened ones.
Cell Wall Breakdown: The heat softens pectin and other compounds in the banana’s cell walls. This is what transforms the firm, almost crunchy texture of green bananas into the soft, creamy consistency needed for baking. The process happens much faster with applied heat than at room temperature.
Peel Darkening: The dramatic blackening of the peel occurs due to enzymatic browning accelerated by heat. The polyphenol oxidase enzyme reacts with oxygen and phenolic compounds in the peel, creating the dark pigments. This is purely cosmetic—the peel was going to darken anyway during natural ripening; heat just speeds it up dramatically.
Moisture Changes: Oven ripening can cause some moisture loss through evaporation, especially if bananas are left in too long. This is why oven-ripened bananas sometimes appear slightly shriveled or have a denser texture than naturally ripened ones. For baking purposes, this is rarely a problem and can even be beneficial in recipes where too much moisture is undesirable.
Flavor Development: Natural ripening develops complex flavor compounds through slower enzymatic reactions. Oven ripening produces sweetness but doesn’t develop the full aromatic complexity. The bananas will taste somewhat “cooked” or “caramelized” rather than having the bright, fresh flavor of naturally ripened fruit.
Oven-Ripened vs. Naturally Ripened Bananas: The Difference
While both methods produce soft, sweet bananas, there are notable differences worth understanding, especially if you’re deciding between waiting or using the fast method.
| Characteristic | Oven-Ripened | Naturally Ripened |
|---|---|---|
| Time Required | 15-40 minutes | 3-7 days |
| Texture | Soft, slightly denser, may be slightly watery | Soft, creamy, consistent throughout |
| Sweetness | Sweet, but less complex | Very sweet with full flavor development |
| Flavor Profile | Slightly cooked/caramelized notes | Fresh, bright, complex banana flavor |
| Appearance | Black peel, flesh may have brown spots | Yellow to brown-spotted peel, even flesh color |
| Best For | Baking, smoothies, recipes where banana is mixed | Eating fresh, recipes where banana flavor is prominent |
| Nutrient Changes | Some vitamin loss from heat exposure | Nutrients preserved, antioxidants may increase |
For baking applications like banana bread, muffins, or pancakes, the differences are minimal. The other ingredients, spices, and cooking process mask any subtle flavor variations. Most people cannot tell the difference between banana bread made with oven-ripened versus naturally ripened bananas.
However, for eating fresh or using in recipes where banana is the star flavor (like banana pudding or banana cream pie), naturally ripened bananas are superior. The flavor is brighter, more complex, and more authentically “banana.” If you have the time, natural ripening is always the better choice for raw consumption.
One advantage of oven ripening: you can ripen green bananas to yellow appearance if you catch them early and use lower heat (250°F for 10-15 minutes). This won’t give you the full flavor development, but it can make slightly green bananas more palatable for eating fresh when you don’t want to wait.
Best Uses for Oven-Ripened Bananas (Baking Recipes)
Oven-ripened bananas excel in recipes where they’re mashed, blended, or thoroughly incorporated with other ingredients. The slightly cooked flavor actually complements baked goods beautifully, adding a subtle caramelized note.
Ideal Recipes for Oven-Ripened Bananas:
- Banana Bread and Muffins: The classic use case. The moisture and sweetness from oven-ripened bananas work perfectly, and any flavor differences are completely masked by cinnamon, vanilla, and the baking process itself.
- Banana Pancakes and Waffles: Mashed oven-ripened bananas add natural sweetness and help bind the batter. The slightly denser texture actually helps create fluffier pancakes.
- Smoothies: Blend oven-ripened bananas with other fruits, yogurt, or milk. The sweetness enhances the smoothie, and you won’t notice any textural differences once blended.
- Banana Oatmeal: Mash warm oven-ripened bananas directly into your morning oatmeal for natural sweetness and creaminess.
- Banana Cookies and Bars: Any recipe calling for mashed banana benefits from the soft texture and sweetness of oven-ripened fruit.
- Banana Ice Cream (Nice Cream): Freeze oven-ripened bananas after cooling, then blend for a healthy ice cream alternative. The slightly cooked flavor mimics the caramelized notes in traditional ice cream.
Recipes to Avoid:
- Fresh Banana Slices: For fruit salads, yogurt parfaits, or cereal toppings, use naturally ripened bananas. The texture and flavor are noticeably different when eaten fresh.
- Banana Pudding (as fresh layers): If your recipe calls for fresh banana slices layered with pudding, naturally ripened bananas maintain better texture and flavor.
- Dehydrated Banana Chips: Oven-ripened bananas are too soft and moisture-inconsistent for successful dehydration.
The key principle: the more the banana is transformed in the recipe, the better oven-ripened bananas work. When banana is a background ingredient rather than the star, you’ll never notice the difference.
Other Fast Methods to Ripen Bananas (Microwave, Paper Bag)
While the oven method is reliable, several other techniques can ripen bananas quickly. Each has advantages and disadvantages depending on your specific needs and timeline.
Microwave Method (Fastest): If you need to know how to ripen bananas in 5 minutes, the microwave is your answer. Poke holes in the unpeeled banana with a fork, place on a microwave-safe plate, and microwave on high for 30 seconds at a time, checking between intervals. Total time: 2-5 minutes depending on ripeness. The banana will be very soft and hot, with a more pronounced cooked flavor than the oven method. Best for immediate use in baking where you’ll use it right away.
Paper Bag Method (Overnight): For those wondering how to ripen green bananas overnight naturally, the paper bag technique works well. Place bananas in a brown paper bag with an apple or ripe tomato (both release ethylene gas, which triggers ripening). Fold the top closed and leave at room temperature. This method takes 12-24 hours but produces results closer to natural ripening. The confined space concentrates ethylene gas, accelerating the process without heat.
Air Fryer Method: To ripen bananas in air fryer, set the temperature to 300°F and cook for 10-15 minutes, checking halfway through. This works similarly to the oven but in a smaller space. The circulating air can cause more moisture loss, so watch timing carefully. Best for ripening just 1-3 bananas when you don’t want to heat your full oven.
Rice Method (24-48 Hours): Bury unpeeled bananas in a container of uncooked rice. The rice traps ethylene gas and provides gentle insulation. This takes 1-2 days but requires no electricity and works well if you’re planning ahead slightly. This is a good option for how to ripen bananas naturally at home without a paper bag.
Warm Spot Method (Natural but Faster): Place bananas in a warm location—on top of the refrigerator, near a sunny window, or on a heating pad set to low. This accelerates natural ripening to 1-3 days instead of 5-7. It’s the slowest “fast” method but produces the most natural-tasting results.
Comparison of Methods:
| Method | Time | Flavor Quality | Best For |
|---|---|---|---|
| Microwave | 2-5 minutes | Most cooked flavor | Extreme emergencies, immediate baking |
| Oven | 15-40 minutes | Slightly cooked | Baking within the hour |
| Air Fryer | 10-15 minutes | Slightly cooked | Small batches, quick baking |
| Paper Bag | 12-24 hours | Nearly natural | Next-day baking, better flavor |
| Rice | 24-48 hours | Natural | Planning 1-2 days ahead |
| Warm Spot | 1-3 days | Most natural | Best flavor, some advance planning |
For those researching how to ripen bananas in microwave versus oven, consider your timeline and intended use. If you need bananas in under 10 minutes and they’re going into a recipe immediately, microwave works. If you have 20-40 minutes and want slightly better texture and flavor, choose the oven. If you can wait overnight, the paper bag method offers the best balance of speed and quality.
Common Mistakes to Avoid When Ripening Bananas in the Oven
Even with a straightforward process, several common errors can lead to disappointing results. Avoiding these mistakes ensures success every time you ripen bananas for baking.
Mistake #1: Using Too High a Temperature
Setting your oven above 325°F risks cooking the bananas instead of ripening them. The result is a mushy, overly soft texture with a strong cooked flavor that doesn’t work well even in baking. Stick to 300°F for best results. If you’re impatient, it’s better to check frequently at 300°F than to rush with higher heat.
Mistake #2: Peeling Before Baking
Some people mistakenly peel bananas before placing them in the oven, thinking it will speed the process. This actually causes the fruit to dry out, develop an unpleasant texture, and potentially burn on the edges. The peel protects the fruit and helps it ripen more evenly. Always leave bananas in their peels.
Mistake #3: Not Lining the Baking Sheet
As bananas heat, they may leak juice or even split slightly. Without parchment paper or foil, you’ll have a sticky mess baked onto your pan. Always line your baking sheet—cleanup will thank you.
Mistake #4: Overcrowding the Pan
Placing bananas too close together creates uneven heating. Leave at least an inch of space between each banana for proper air circulation and even ripening. This is especially important if you’re ripening a large batch.
Mistake #5: Not Checking Progress
Oven temperatures vary, and banana ripeness varies. Setting a timer and walking away can lead to over-ripened, nearly liquified bananas. Check at the minimum recommended time and add more time as needed. It’s impossible to over-check, but easy to over-ripen.
Mistake #6: Using Them Too Hot
Bananas straight from the oven are extremely hot and steaming inside. Using them immediately can throw off recipe temperatures (especially important in recipes with butter or eggs that are temperature-sensitive). Let them cool for at least 5-10 minutes, or run under cool water briefly to speed cooling.
Mistake #7: Expecting Perfect Natural Ripening Results
Some bakers are disappointed when oven-ripened bananas don’t taste exactly like naturally ripened ones. Adjust your expectations—this is a convenience method that prioritizes speed over perfect flavor. For baking, the results are excellent; for eating fresh, they’re acceptable but not ideal.
Mistake #8: Storing Oven-Ripened Bananas Too Long
These bananas have been heat-treated and are more prone to breaking down quickly. Use within 24 hours for best results. If you must store them, refrigerate in an airtight container, but expect some textural changes.
Mistake #9: Using Already Ripe Bananas
If your bananas are already yellow with brown spots, they don’t need oven ripening—they’re ready to use. Putting ripe bananas in the oven will just cook them unnecessarily. This method is specifically for green or under-ripe bananas.
How to Ripen Bananas Immediately: Choosing the Right Method for Your Needs
When you need to ripen bananas immediately, your choice of method should match your specific situation. Understanding the nuances helps you make the best decision every time.
If you’re baking within the next hour: The oven method at 300°F is your best bet. It provides enough time to preheat, ripen, and cool the bananas while you prepare other ingredients. The texture and flavor work perfectly for banana bread, muffins, or any baked good.
If you’re baking right this second: Use the microwave method. While it produces the most “cooked” flavor, it gets you baking-ready bananas in under 5 minutes. The difference won’t be noticeable in most recipes, especially those with strong spices or chocolate.
If you’re baking tomorrow: Use the paper bag method with an apple or tomato. This gives you nearly natural ripening overnight, producing superior flavor while still being much faster than counter ripening. This is the sweet spot for planning ahead just slightly.
If you want to eat them fresh: Even the fastest methods won’t produce bananas that taste great fresh. If you must eat them within 24 hours, use the paper bag method and hope for the best. Otherwise, buy ripe bananas or wait for natural ripening.
If you’re ripening a large batch: The oven accommodates multiple bananas easily (just don’t overcrowd). You can ripen 6-8 bananas at once for a big batch of banana bread or muffins. The microwave is less practical for large quantities.
If you’re concerned about energy use: The microwave uses less energy than heating a full oven. For 1-2 bananas, it’s the more efficient choice. For larger batches, the oven’s energy use is justified.
Understanding how to ripen bananas in minutes versus hours versus days gives you flexibility. Keep green bananas on hand, and you’ll always have the option to ripen exactly what you need, when you need it, using the method that best fits your timeline and intended use.
Tips for Preventing the Need to Rush-Ripen Bananas
While knowing how to ripen green bananas quickly is valuable, preventing the situation altogether is even better. These strategies help ensure you always have properly ripened bananas when you need them.
Buy Bananas at Different Ripeness Stages: Instead of buying all green or all yellow bananas, purchase a bunch at different stages. Get some green for later in the week, some yellow for mid-week, and some with brown spots for immediate use. This staggers your supply naturally.
Use the Refrigerator Strategically: Once bananas reach your preferred ripeness, refrigerate them to halt further ripening. The peel will turn brown, but the fruit inside stays at the same ripeness for 5-7 additional days. This gives you a much wider window for using them.
Freeze Overripe Bananas: When bananas get too ripe before you can use them, peel and freeze them in airtight bags. Frozen bananas work perfectly in smoothies and baking—just thaw before using in recipes that require mashing. This eliminates waste and ensures you always have baking-ready bananas.
Separate Bananas from the Bunch: Bananas release ethylene gas from the stem. Keeping them bunched together concentrates this gas and speeds ripening. Separate individual bananas to slow the process, or keep them bunched to speed it up—your choice depending on your timeline.
Plan Baking Days Around Banana Ripeness: Instead of deciding to bake and then realizing your bananas aren’t ready, plan your baking for when your bananas naturally reach peak ripeness. This requires some observation and planning but produces the best-tasting results.
Keep a Ripening Schedule: If you buy bananas weekly, note how long they take to ripen in your specific kitchen environment. Temperature, humidity, and airflow all affect ripening speed. Once you know your typical timeline (say, 5 days from purchase to perfect ripeness), you can plan accordingly.
These prevention strategies don’t eliminate the need to know how to ripen bananas naturally at home overnight or how to ripen bananas for banana bread quickly—but they reduce how often you’re in a banana emergency.
Understanding Banana Ripeness Stages and What They Mean
Knowing exactly what stage your bananas are at helps you decide whether oven ripening is necessary and how long it will take. Each stage has specific characteristics and best uses.
Stage 1: Bright Green
Appearance: Completely green peel, very firm to the touch
Taste: Starchy, bitter, astringent
Best For: Nothing immediately—these need 5-7 days natural ripening or 35-40 minutes oven ripening
Sugar Content: Lowest (mostly starch)
Stage 2: Green-Yellow
Appearance: Mostly green with yellow emerging, firm but slightly yielding
Taste: Still starchy, slightly sweet
Best For: Cooking applications like plantain substitutes; needs 3-4 days natural ripening or 25-30 minutes oven ripening
Sugar Content: Low to moderate
Stage 3: Yellow with Green Tips
Appearance: Mostly yellow with green at stem and tip, yields slightly to pressure
Taste: Mildly sweet, less starchy
Best For: Eating fresh if you prefer firmer bananas; needs 1-2 days natural ripening or 15-20 minutes oven ripening for baking
Sugar Content: Moderate
Stage 4: Fully Yellow
Appearance: Bright yellow peel, no green, soft but not mushy
Taste: Sweet, classic banana flavor
Best For: Eating fresh, fruit salads, cereal toppings
Sugar Content: High
Note: Perfect for eating, but needs a few brown spots for optimal baking
Stage 5: Yellow with Brown Spots
Appearance: Yellow peel with brown freckles, very soft
Taste: Very sweet, intense banana flavor
Best For: Baking, smoothies, banana bread—this is the ideal stage
Sugar Content: Highest
Note: This is what you’re trying to achieve with oven ripening
Stage 6: Mostly Brown
Appearance: Brown peel with some yellow, very soft and fragrant
Taste: Extremely sweet, almost fermented notes
Best For: Banana bread, muffins, freezing for later use
Sugar Content: Highest, some sugars converting to alcohol
Note: Still excellent for baking but getting close to overripe
Stage 7: Completely Brown/Black
Appearance: Dark brown to black peel, liquid-soft
Taste: Overly sweet, fermented
Best For: Composting or last-chance banana bread if the inside isn’t moldy
Sugar Content: Maximum, significant fermentation
Note: Past prime but sometimes salvageable
When you ripen banana in oven, you’re artificially jumping from stages 1-3 to stage 5. The visual result (black peel) looks like stage 7, but the inside should resemble stage 5—soft, sweet, and perfect for baking.
The Science of Why Oven Ripening Works
Understanding the biological and chemical processes explains why applying heat can substitute for time in banana ripening. This knowledge helps you troubleshoot problems and optimize your technique.
Ethylene Gas and Ripening: Bananas naturally produce ethylene gas, a plant hormone that triggers ripening. In natural conditions, this gas slowly accumulates around the fruit, signaling cells to begin the ripening cascade. Heat doesn’t increase ethylene production significantly, but it does accelerate the cellular responses to ethylene that’s already present.
Enzyme Activation: Ripening involves numerous enzymes—amylase breaks down starch, pectinase softens cell walls, and polyphenol oxidase causes browning. These enzymes work faster at higher temperatures (up to a point). At 300°F, you’re in the sweet spot where enzymes work rapidly without denaturing (breaking down from excessive heat).
Starch-to-Sugar Conversion: Green bananas contain 20-25% starch and only 1% sugar. Ripe bananas flip this ratio to 1% starch and 15-20% sugar. The enzyme amylase catalyzes this conversion, and heat dramatically speeds the process. This is why oven-ripened bananas taste sweet despite not having the full time to develop complex flavors.
Chlorophyll Breakdown: The green color in unripe banana peels comes from chlorophyll. As ripening progresses, chlorophyll breaks down, revealing yellow carotenoid pigments underneath. Heat accelerates this breakdown, which is why even moderately heated bananas develop yellow coloring quickly.
Cell Wall Degradation: Pectin and hemicellulose in cell walls give green bananas their firm texture. Enzymes like polygalacturonase break these down during ripening, softening the fruit. Heat speeds this enzymatic activity, which is why oven-ripened bananas become soft so quickly.
Why the Peel Turns Black: The dramatic blackening is enzymatic browning on overdrive. Polyphenol oxidase, which normally causes gradual brown spots, works extremely rapidly under heat. The peel turns black while the inside remains relatively light because the peel has higher concentrations of phenolic compounds and is exposed to more oxygen.
This scientific understanding reveals why oven ripening works but also why it can’t perfectly replicate natural ripening. Heat accelerates the mechanical processes (softening, sweetening) but can’t create the complex flavor compounds that develop through slower, enzymatic reactions over days.
Nutritional Considerations: Do Oven-Ripened Bananas Lose Nutrients?
Health-conscious bakers often wonder whether the oven ripening process affects the nutritional value of bananas. The answer is nuanced and depends on what nutrients you’re concerned about.
Heat-Sensitive Vitamins: Vitamin C and some B vitamins (particularly thiamine and folate) are heat-sensitive. Oven ripening at 300°F for 15-40 minutes causes some degradation—estimates suggest 10-25% loss depending on time and temperature. However, bananas aren’t a primary vitamin C source anyway (one banana provides only about 10% of daily needs), so this loss is relatively insignificant in the context of your overall diet.
Minerals: Potassium, magnesium, and other minerals are heat-stable and remain unchanged by oven ripening. You’ll get the same 422mg of potassium from an oven-ripened banana as from a naturally ripened one.
Fiber: Both soluble and insoluble fiber remain intact during oven ripening. The softening process doesn’t destroy fiber—it just makes it less noticeable texturally. You’ll still get approximately 3 grams of fiber per banana.
Resistant Starch: This is where things get interesting. Green bananas are high in resistant starch, a type of fiber that resists digestion and acts as a prebiotic, feeding beneficial gut bacteria. As bananas ripen (naturally or artificially), resistant starch converts to simple sugars. Oven ripening accelerates this conversion, so oven-ripened bananas have minimal resistant starch. If you’re specifically eating green bananas for their resistant starch content (some people do for blood sugar management), oven ripening defeats that purpose.
Antioxidants: Bananas contain dopamine and catechin antioxidants. Heat can reduce some antioxidant content, but ripening (even natural ripening) also changes antioxidant profiles. Interestingly, some antioxidants increase with ripening while others decrease. The net effect of oven ripening versus natural ripening is minimal from an antioxidant perspective.
Glycemic Impact: Riper bananas (whether oven-ripened or naturally ripened) have a higher glycemic index because their sugars are more readily available. Green bananas have a GI of around 30-50, while ripe bananas are 50-70. This is relevant for people managing blood sugar, but it’s a function of ripeness itself, not the ripening method.
Bottom Line: For most people using bananas in baking, the nutritional differences between oven-ripened and naturally ripened bananas are negligible. The bigger nutritional consideration is ripeness level (green vs. ripe) rather than ripening method. If you’re using bananas primarily for their resistant starch or specific vitamin content, stick with green or naturally ripened bananas. For general nutrition in baked goods, oven ripening is perfectly fine.
Troubleshooting Common Oven Ripening Problems
Even with careful attention, sometimes oven ripening doesn’t go as planned. Here’s how to identify and fix common issues.
Problem: Bananas Are Still Firm After Recommended Time
Cause: Your bananas were extremely green, or your oven runs cool
Solution: Add 10-15 minutes and check again. Very green bananas can take up to 50 minutes. Use an oven thermometer to verify your oven’s actual temperature matches the setting.
Problem: Bananas Split or Burst in the Oven
Cause: Temperature too high, or bananas left in too long
Solution: This doesn’t ruin them for baking—just scoop out the flesh. To prevent it, lower temperature to 275°F and check more frequently. Some splitting is normal and doesn’t indicate a problem.
Problem: Bananas Taste Too “Cooked” or “Baked”
Cause: Temperature too high or time too long
Solution: For future batches, reduce temperature to 275°F and check earlier. For current batch, use in recipes with strong flavors (chocolate banana bread, spiced muffins) where the cooked flavor will be masked.
Problem: Bananas Are Watery or Mushy
Cause: Overripened in oven, or bananas were already quite ripe before starting
Solution: Drain excess liquid before using in recipes, or reduce other liquids in the recipe slightly. These bananas still work fine for baking—just adjust moisture accordingly.
Problem: Peel Is Black but Inside Is Still Firm
Cause: Oven temperature too high, causing peel to brown before interior ripens
Solution: Continue baking at reduced temperature (250°F) for another 10-15 minutes. The peel can’t get much blacker, but the inside will continue softening.
Problem: Bananas Stuck to Baking Sheet
Cause: Forgot to line the pan, or bananas leaked significantly
Solution: Let the pan cool completely, then use a spatula to gently pry bananas off. For future batches, always use parchment paper or foil. If bananas are really stuck, run hot water over the back of the pan to loosen them.
Problem: Uneven Ripening (Some Soft, Some Still Firm)
Cause: Bananas were different ripeness levels to start, or oven has hot spots
Solution: Check each banana individually and remove soft ones while continuing to ripen firmer ones. Rotate the pan halfway through for more even heating. Start with bananas at similar ripeness levels.
Problem: Bananas Smell Fermented or “Off”
Cause: Bananas were already overripe before oven ripening, or left in oven too long
Solution: If the smell is mild, they’re still fine for baking. If it’s strong or they show mold, discard them. Only oven-ripen green to yellow bananas, never ones that are already heavily spotted.
Creative Uses for Oven-Ripened Bananas Beyond Traditional Baking
While banana bread and muffins are the classic uses, oven-ripened bananas can enhance many other recipes. Their soft texture and concentrated sweetness make them surprisingly versatile.
Banana Breakfast Bowl: Mash warm oven-ripened banana into oatmeal, quinoa porridge, or overnight oats. The warmth helps it incorporate smoothly, adding natural sweetness without added sugar. Top with nuts, seeds, and berries for a complete breakfast.
Banana Protein Smoothie: Blend oven-ripened banana with protein powder, milk (dairy or plant-based), peanut butter, and ice. The extra sweetness means you can reduce or eliminate added sweeteners. The soft texture blends perfectly smooth.
Banana Pancake Syrup: Mash oven-ripened bananas with a splash of maple syrup and cinnamon. Warm in a saucepan until it reaches syrup consistency. Drizzle over pancakes, waffles, or French toast for a healthier topping.
Banana Energy Bites: Combine mashed oven-ripened banana with oats, nut butter, honey, and mix-ins like chocolate chips or dried fruit. Roll into balls and refrigerate. The banana acts as a natural binder and sweetener.
Banana Yogurt Parfait: Layer Greek yogurt with mashed oven-ripened banana and granola. The banana adds sweetness to plain yogurt without the added sugars of flavored varieties.
Banana Baby Food: For parents making homemade baby food, oven-ripened bananas are perfectly soft and naturally sweet. Mash or puree for babies 6+ months. The gentle cooking makes them even easier to digest.
Banana Salad Dressing: Blend oven-ripened banana with vinegar, olive oil, and Dijon mustard for a unique, slightly sweet salad dressing. It works particularly well on spinach salads with nuts and berries.
Banana Face Mask: Mash oven-ripened banana with honey for a moisturizing face mask. The heat-softened banana is easier to apply smoothly. Leave on for 15 minutes, then rinse. (Yes, really—bananas are great for skin!)
Banana Dog Treats: Mix mashed oven-ripened banana with whole wheat flour and peanut butter. Roll out, cut into shapes, and bake for homemade dog treats. Dogs love the sweetness, and it’s healthier than many commercial treats.
The key advantage of oven-ripened bananas in these applications is their immediate availability and consistent texture. You don’t have to wait days for bananas to ripen naturally—you can decide to make banana energy bites and have ripe bananas ready in 30 minutes.
Final Thoughts: Mastering the Art of Quick Banana Ripening
Learning how to ripen banana in oven is a valuable skill for any home baker or banana enthusiast. While it can’t perfectly replicate the complex flavors of naturally ripened fruit, it provides a reliable, fast solution when time isn’t on your side. The method is straightforward—300°F for 15-40 minutes depending on initial ripeness—but success comes from understanding the nuances: proper temperature, careful timing, and appropriate applications.
The oven method shines in baking applications where banana is mashed or blended with other ingredients. For banana bread, muffins, pancakes, and smoothies, most people cannot distinguish between oven-ripened and naturally ripened bananas. The slight caramelized flavor can even enhance certain recipes. However, for eating fresh or using in recipes where banana is the star flavor, natural ripening remains superior.
Remember that prevention is better than emergency ripening. Buying bananas at different ripeness stages, using the refrigerator strategically, and freezing overripe bananas ensures you always have the right banana for your needs. But when life happens and you need ripe bananas immediately, the oven method delivers consistent results every time.
Whether you’re making a last-minute batch of banana bread for a bake sale, need bananas for your morning smoothie, or simply can’t wait for nature to take its course, oven ripening puts you in control. Master this technique, understand when to use it versus other methods, and you’ll never again be stopped by green bananas standing between you and your baking goals.
Frequently Asked Questions
Can you ripen a banana in the oven?
Yes, you can ripen banana in oven by baking unpeeled bananas at 300°F for 15-40 minutes depending on their initial greenness. This method uses gentle heat to break down the starches into sugars, softening the fruit quickly. While oven-ripened bananas won’t develop the same complex flavor as naturally ripened ones, they work perfectly for baking recipes like banana bread or muffins. The peels will turn completely black, but the fruit inside becomes soft and sweet.
How long does it take to ripen bananas in the oven?
The time to ripen banana in oven ranges from 15 to 40 minutes at 300°F, depending on how green your bananas are initially. Very green bananas may need the full 40 minutes, while bananas that are already slightly yellow might only need 15-20 minutes. You’ll know they’re ready when the peels turn completely black and the bananas feel soft when gently squeezed with an oven mitt.
What temperature should I use to ripen bananas in the oven?
The ideal temperature to ripen banana in oven is 300°F (150°C), which provides gentle, even heat that softens the fruit without cooking it too quickly. Some recipes suggest 350°F for faster results, but this higher temperature can sometimes cook the bananas unevenly or make them mushy. Lower temperatures around 250°F work too but will require 10-15 minutes of additional baking time.
Will oven-ripening make bananas sweeter?
Yes, oven-ripening does make bananas sweeter by converting starches into sugars through heat exposure. However, the sweetness won’t be quite as complex or developed as naturally ripened bananas because the process happens too quickly for all the flavor compounds to fully develop. Oven-ripened bananas are best used in baking recipes where other ingredients complement the banana flavor.
What is the fastest way to ripen bananas?
The fastest way to ripen bananas is using the oven method, which takes just 15-40 minutes compared to 1-3 days for natural ripening. For even faster results in about 30 seconds, you can microwave unpeeled bananas, though this tends to make them mushier and less ideal for most recipes. The oven method strikes the best balance between speed and maintaining usable texture for baking.
Can I ripen a banana in the microwave instead of the oven?
Yes, you can ripen bananas in the microwave by poking holes in the peel and microwaving for 30 seconds at a time until soft. This is the absolute fastest method, taking just 1-2 minutes total, but it often creates a mushier texture than oven-ripening. Microwave ripening works in a pinch for smoothies or heavily mashed recipes, but the oven method produces better results for most baking applications.
How do you ripen bananas naturally without an oven?
To ripen bananas naturally at room temperature, place them in a paper bag with an apple or ripe banana, which traps ethylene gas and speeds ripening to 24-48 hours. Leaving bananas on the counter at room temperature will ripen them in 3-5 days naturally. Never refrigerate green bananas as cold temperatures halt the ripening process, though ripe bananas can be refrigerated to slow further ripening.
Do oven-ripened bananas work for banana bread?
Yes, oven-ripened bananas work excellently for banana bread and other baked goods where you need soft, mashed bananas. While they won’t have the exact same depth of flavor as naturally overripe bananas, they provide the right sweetness and texture for successful baking. Let oven-ripened bananas cool completely before peeling and mashing them into your recipe for best results.
Should I peel bananas before ripening them in the oven?
No, you should always ripen banana in oven with the peel on to protect the fruit from drying out and cooking unevenly. The peel acts as a natural barrier that allows the banana to steam gently in its own moisture. After baking, let the bananas cool for 5-10 minutes, then simply cut off the ends and squeeze out the softened fruit from the blackened peel.
Can you ripen bananas in an air fryer?
Yes, you can ripen bananas in an air fryer at 300°F for 10-15 minutes, making it even faster than the conventional oven method. The circulating hot air ripens them quickly and evenly, though you should check them every 5 minutes to prevent over-cooking. This method works great if you only need to ripen 1-2 bananas and don’t want to heat up your full oven.
You May Also Like
How to Ripen Bananas for Banana Bread: Fast & Natural Methods

Benefits of Banana Bread: Is It Healthy or Just Dessert?